Tuesday, 9 December 2014

CHANGE THE WORLD FILM PROJECT: INITIAL IDEA

For our change the world project, our initial idea was to create a film which would begin with one person doing a good deed to another such as giving them money or offering them directions and we would then follow them as they would go on to receive a good deed from someone else and a chain would be created. 

Due to the fact that this would require many actors and good weather, this idea unfortunately had to be changed and so instead we decided upon filming a documentary style piece, combining interviews with a range of establishing shots. This we felt would allow us to demonstrate our audio skills and fine tune our camera work, while also include various editing techniques which we have not yet displayed. 

The general structure of this piece will consist of an establishing shot, followed by footage of the interview itself. Whilst the interview audio is playing, we will also splice in some shots of the location in question in order to give more scope to where the interview is taking place as well as allowing us to display our editing skills. Titles will also be used in order to make it clear what our objective is and what we are asking the interviewees. The two questions which we shall use will be "With £5 how would you change the world?" and "How would you destroy the world?" This questions I believe link to the brief as it does not specify whether the change should be good or bad and so will display both sides of the objective whilst also allowing a range of opinions to be collected. 

Sunday, 7 December 2014

EXPERIMENTING WITH PRO TOOLS

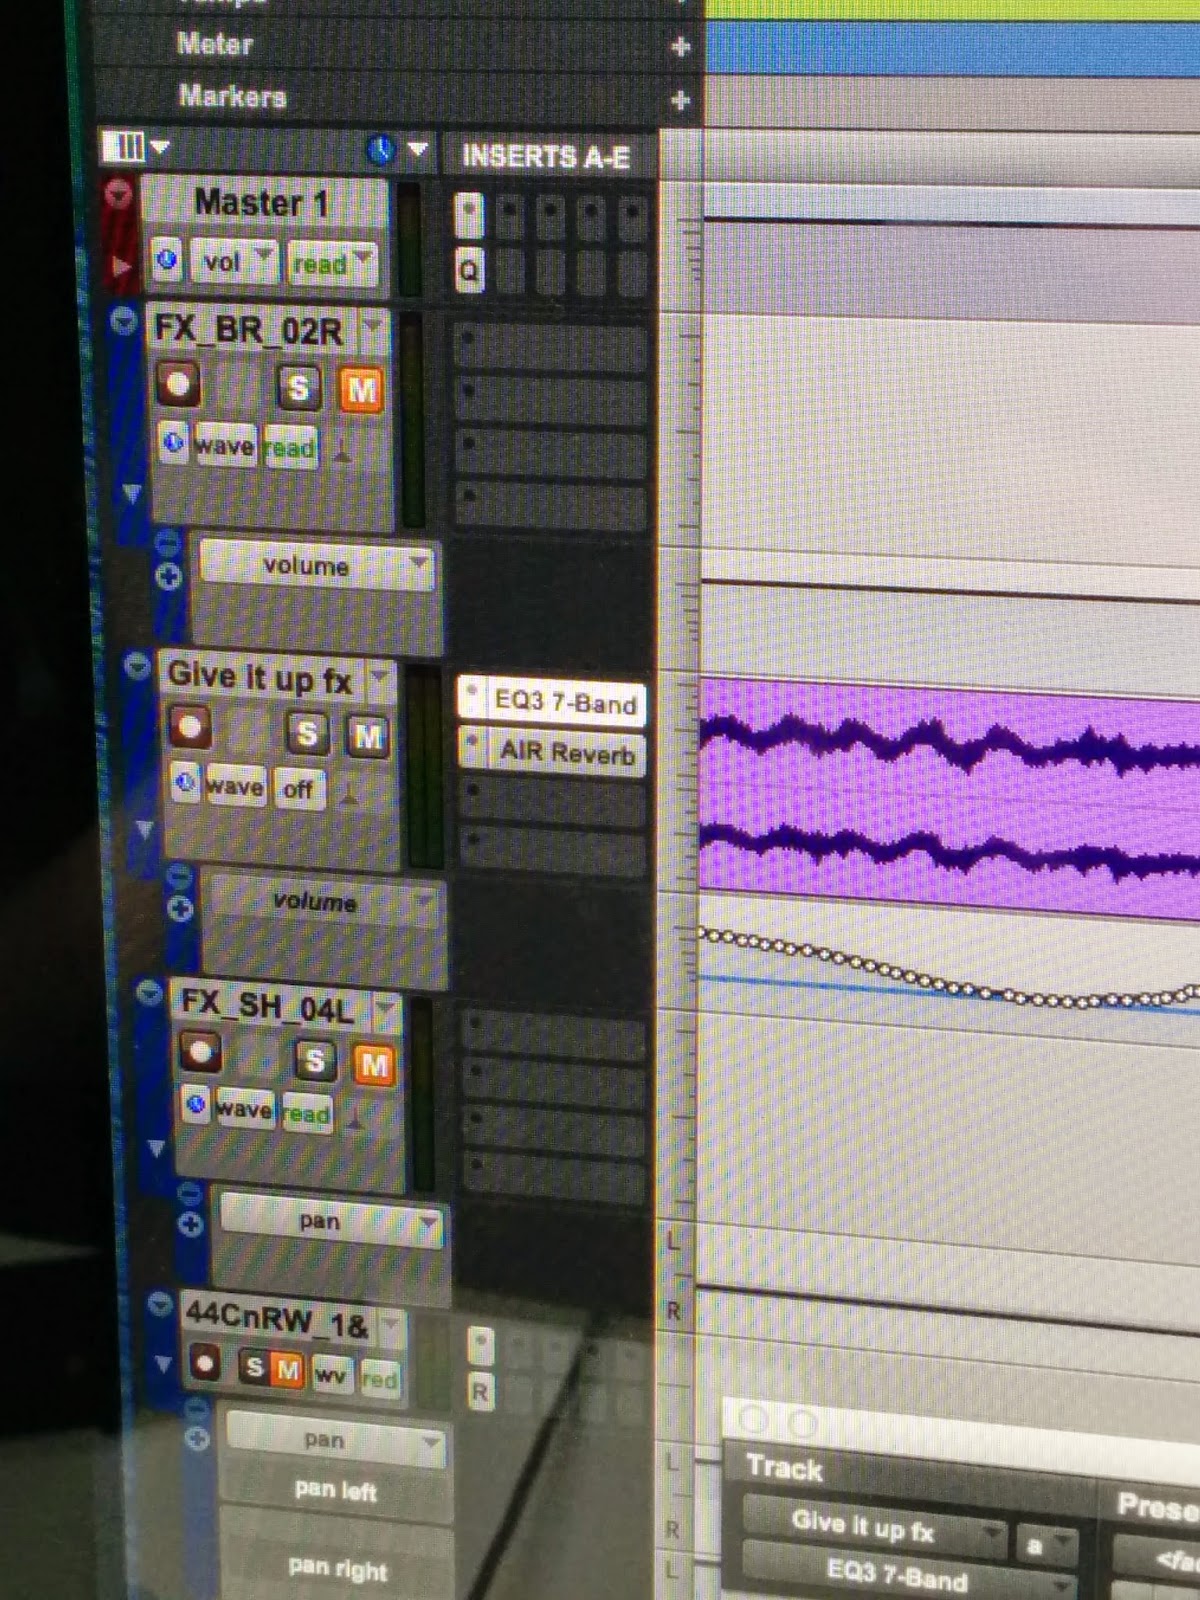
In a recent session, we were tasked with creating an audio track lasting between two and three minutes. For my piece I aimed to create a brief atmospheric track, incorporating various stereo audio clips available on media composer. We also learnt how to utilise the audio EQ mixer which allows you to alter the pitch and tone of any sound file. This aids in creating a unique sound to each person. 

We also learnt how to achieve a fade up and fade out which can also add to the atmosphere which you are hoping to create with your audio piece. This is especially useful when you wish to overlap your audio and is an effective way to connect your sounds. 


Pro Tools screenshot: Audio EQ Mixer
Pro Tools screenshot: manipulating the volume levels.


ANALYSING THE FEATURES OF POST PRODUCTION IN DOCUMENTARY AND DRAMA NOVEMBER 28TH

As part of Fridays session as well as discovering Walter Murch's rule of 6 and experimenting with the titles feature on media composer, we also analysed two different films, one a drama the other a documentary. For the documentary aspect, we watched a 16 minute film, encompassing the making of Francis Ford Coppola's 1979 War drama 'Apocalypse Now'. 

One of the key features of the film which I noticed was the related use of visual references used to aid the viewer. A prime example of this was during Coppola's narration of the filming of the infamous Nung River assault. He explained that they had filmed enough footage to create a feature length film just from this scene. During this narration we see a shot of the room in which the footage is stored with reels and reels of film upon shelves. Layered over this shot is then the actual scene being discussed from the film, giving a clear visual references for the audience.

The use of visual references is repeated throughout, once again during Coppola's discussion of the editing process for his film and how he instead of assigning a single editor for one scene, he let each editor edit the scene so that all possible edits could be contributed and completed. While he narrates, visual symbolism is shown as the Nung River assault plays under and at the exact moment Coppola explains how this editing process drove his editors 'crazy', we see a grenade being thrown into a helicopter and exploding.

The film under the drama genre was Milos Formans 1984 biographical drama 'Amadeus'. In this film, sound in general is used to great effect along with imagery to create a juxtaposition. This is notable during the first scene in which Salieri attempts suicide. Up until his bedroom door is opened, dialogue is the only audio heard, yet at the very second one of his servants breaks down the door, the drama is elevated significantly. As a non diegetic orchestral score rises up to an extremely high volume and we see Salieri lying on the floor writhing in a white nightshirt with bright red blood running down it. 

This is continued as he is carried on a stretcher through the streets and he looks up toward a building where we then see a hall filled with people dancing to Mozart as we cut back to Salieri's cold face. This juxtaposition is used in order to create and display the contrast between Mozart and Salieri and also suggest symbolically that it is Mozart who has driven Salieri to attempt suicide.

The editing is also used to great effect when Salieri is remenising about his time as a composer. A sound bridge is used as Salieri raises his hands as if to conduct an orchestra and we cut to a flashback of a much younger Salieri conducting. As the piece finishes, the younger Salieri freezes whilst posing we cut back to an older Salieri holding the exact same pose within the from. This I feel was done to blur the line between the past and present and to display how vivid the memories are for Salieri himself.

THE FEATURES OF POST PRODUCTION: NOVEMBER 28TH

In our last session, we covered the topic of post production and the various effects and meanings which can be conveyed within it. Renowned editor and sound designer Walter Murch constructed a general rule for post production which lists the various feature of post production in the order of their importance;

The first and most important part of post production to be considered is the emotion of the film and to make sure that it flows naturally in the correct way the director wishes. Murch adds that this is most important during post production as each cut must preserve the emotion, rather than distract the audience from it instead.

The second most important feature is the story. Naturally this will be an important feature as the piece you are editing has to make sense but also has to advance the story in a meaningful way. The key to editing the story is to make sure that you cut out any footage which may distract the audience from the story altogether. 

Rhythm is the third important feature in Murch's eyes and rightly so as when editing, if your films pace jumps around from swift to slow, then the film itself shall become to complex for your audience to engage with, leading to them becoming bored and eventually disengaging with it entirely. 

Alongside reading up on Murch's rules of post production, we also experimented with using titles on media composer, allowing us to improve our future pieces further. 


Sunday, 23 November 2014

NEW PROJECT 'CHANGE THE WORLD': WEDNESDAY 19TH NOVEMBER

During this session we watched our completed Grindleford films and were then given feedback on the pros and cons of it. 

For most pieces, one thing which appeared repeatedly was the lack of the use of a tripod when filming, causing the frames to become unsteady and lacking the professional look which is expected of us at this stage. I believe this feedback was most useful in helping me understand how such simple things like using a tripod can improve my work tenfold. 

We were also given the brief for our next project. With the theme being based on changing the world, this allows us access to a wide range of topics to cover. For this I believe that the piece will have to contain eye catching editing techniques and cinematography in order to convey the positive themes of the piece.

Sunday, 16 November 2014

'INTRODUCTION TO 3 POINT LIGHTING' FRIDAY 14TH NOVEMBER

During the last session, we were introduced to one of the most pivotal aspects of cinematography and film making in general, lighting. We also set up as though to film an interview. For this we were taught to align the camera with the interviewees eyes and to do so whenever filming an interview. The shot used was a medium close up.

In the session, we were taught how three point lighting stands as the cornerstone of lighting, be it for a set or for lighting an interview. The equipment we used for the session was a Dedo DLH4 kit, which included 3 lights, stands and dimmers. When setting up the lights, we were also informed of the correct names and positions the lights took when using three point lighting. 

The first light used is named the key light which is used to give primary light and exposure to the subject. This is positioned so that the light directly hits the subject, the key light serves as defining the colour and angle of the overall lighting in the shot. 

The second light used is the fill light which serves as lighting the opposite side of the subject which aids in creating a more detailed form to film. The brightness of this second light is half that of the fill, which adds to the overall texture of the subject. 

The third and final light is the back light which fills in the remaining areas which the key and fill have missed. This is positioned at a 45 degree angle opposite the fill to create a triangular outline. 

Our three point lighting setup for an interview.


Each light was positioned at a 45 degree angle
All the lights were positioned at the same height


Complete setup for our interview

Throughout the session, we were also taught a range of terms in relation to lighting and work on a film set.

Blocking: Where actors practice and rehearse their movements and gain a sense of the space they have for the performance on set or stage.

Grading: The adjusting of the colour of an image. 

Chiaroscuro: The use of strong contrasts between light and dark, usually using bold contrasts which affect the whole piece.

Stop Difference: When one light is brighter than the other.

Alongside this we were also Informed about the general schedules of shooting a script, for example the average time to page ratio for a feature film averages a minute of dialogue per page. The shooting schedule for a feature film equates to three to four pages a day, contrasting with that of a soap opera, averaging ten to twelve pages per day.


Wednesday, 12 November 2014

FOUNDATION PRODUCTION SKILLS: SHORT FILM REPORT


GRINDLEFORD SHORT FILM from Adam Barton on Vimeo.


Within our group of four, we each assigned different roles, I directed the piece, Patrick 
Clifton took control of the camera work, Nick Gosling operated the sound and Jordan Heathcote edited the piece. While each person primarily worked on their roles, we all contributed creative input which was taken on board until we were all agreed on an idea.

Once we arrived there, we decided to brainstorm a few ideas first so that we had an idea of what we would do. As we were not sure whether the piece had to have a narrative, we decided upon gaining as many interesting shots as possible so that then if we were to construct a narrative, we would be able to base one on the footage we took on the day during post production. In order to improve this however, it may have been wiser to construct a shooting list and do a reconnaissance of the area which would have been a more effective use of our time.

When it came to the actual shooting, we failed to check our camera settings prior to the shoot the night before, which unfortunately came to have significant consequences. To worsen the situation further, it was not until we had shot half of our footage, that we noticed it, meaning that we had lost not only half of our footage but also half the day.

 The fault for not correcting the settings lies on me as I was the one who took out the camera and so should have checked the recommended settings the night before. This experience has taught me a valuable lesson in regards to checking the equipment before use and the effects it can have if you fail to do so.

With regards to the possible themes with which to base our piece on, we decided that instead of picking one of the three pairs, to combine various themes suggested so as to add more variety to our piece and display the various locations available to us. This primarily involved the church as there were a variety of textures with which to utilise the camera such as focus pulls and long tilts. 

The movements of the camera were also primarily steady and slow pans and zooms as a way of symbolising the calm and peaceful atmosphere which was being filmed. This also allowed the viewers to take in the beauty of the area. As well as still nature such as trees and bushes, we also decided to add the footage of the cat to provide some moving nature and create a more engaging element for the film.

If I had the opportunity to create this film again, naturally the first thing I would change is to check the setting of the camera beforehand so all the footage I shoot is in the correct format. I would also try to experiment further with shot types and camera movements to help the audience engage with the film.